Brief Creation with Article Writer
Content Briefs created with Scalenut enable marketing teams to delegate effectively, communicate requirements clearly, and reduce the back and forth.
In this video, we go over,
- Using Article Writer to create your Content Brief.
- Building a Content Outline in detail.
- Sharing the Content Brief.
- Using the Content Brief with AI Editor to create content.
Creating Content Briefs with Scalenut makes the management of the content pipeline a smooth process.
To create a content brief, click on ‘Article Writer’ in the menu to your left.
Create a new SEO Research Document or select from the existing one for which you wish to create a content brief.
To get started,open a report.
Your SEO editor will open up to give you all the information it gathered for your keyword.
To the right of your screen is where your content brief will start taking shape under the “Research” section.
Click on “Detailed Report”
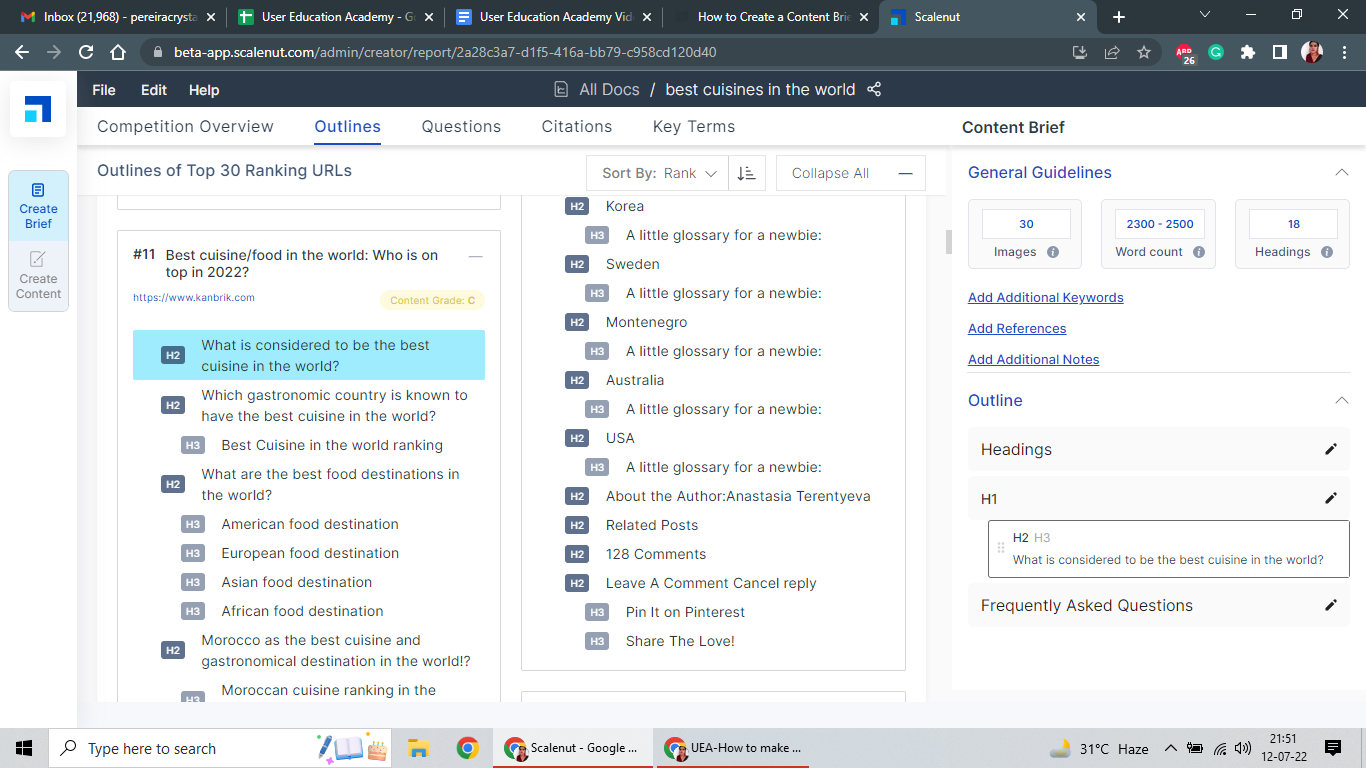
You will notice that your brief comes with some suggested guidelines already. These include the number of images, the ideal word count, and the number of headings your blog should have.
To start creating your structure, click on the ‘Outlines’ tab.
Here you will find Heading breakdowns for the top 30 ranking URLs based on your keyword. You can use these headings to piece together your wireframe.
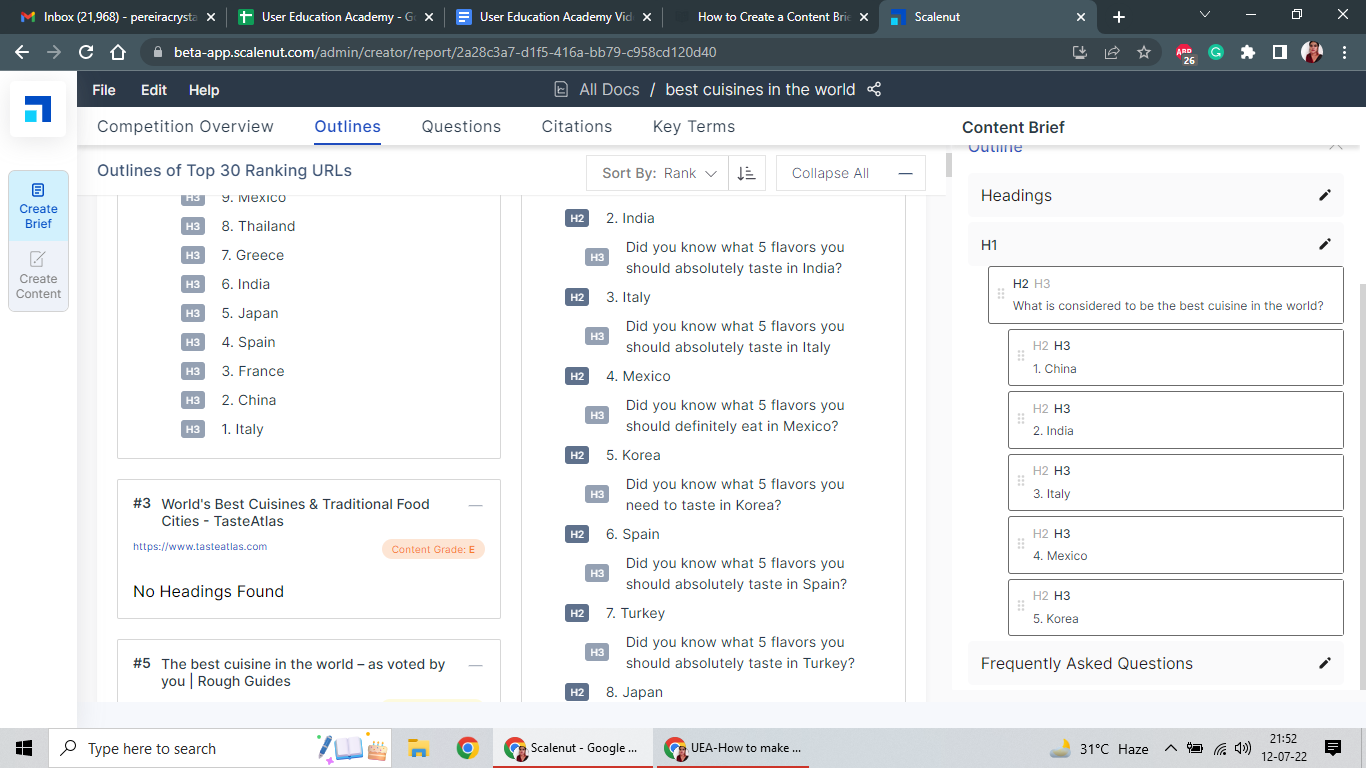
Say you like any H-tag. Simply click on it and watch it line up in your brief to the right. To edit the heading you chose, click on it in your outline and make the changes needed.

To change any H2s to H3s, click on the greyed-out ‘H3’ next to ‘H2’.

If you find an H1 you like, simply click on it and select ‘Confirm’ when the pop-up appears. Voila! You now have a new title.
To delete a heading, just hover over the heading card, and a red bin will appear to the right. Click the red bin to delete.
You can drag and drop the cards to rearrange them in any order you like.
Once your Outline is looking strong, you can switch to the ‘Questions’ tab.
Here you will find the Top Questions for your keyword across multiple channels.
Hover over a question you would like to add, and you will see two options.
If you want your writer to refer to the question for reference, choose “Insert as a Reference.”
You will see the link to the question appear under References in your brief.
To add the question as a FAQ to be elaborated upon in your blog, choose “Insert as a FAQ.” The Question now appears under the Frequently Asked Questions section.
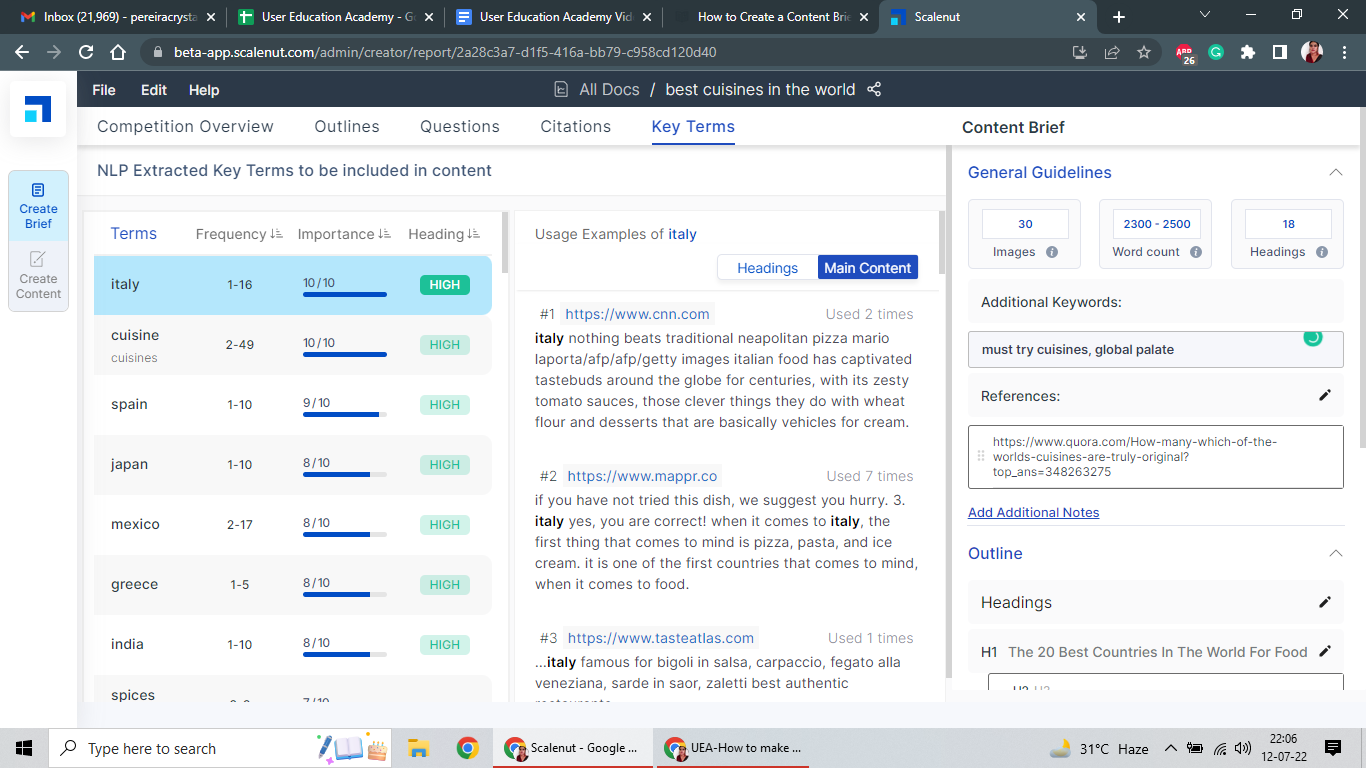
Next, you can head to the ‘Key Terms’ tab. Here, you will find the NLP Terms you must include in your content.
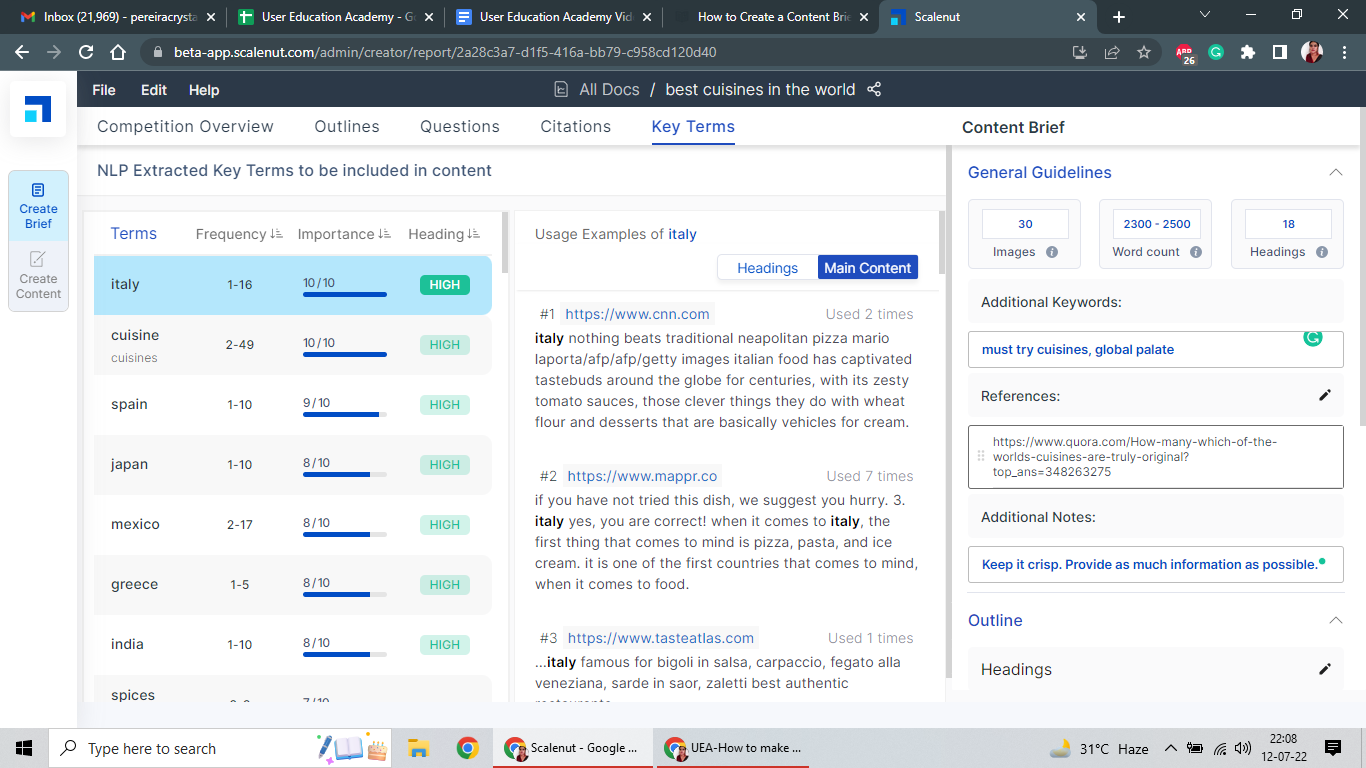
If you wish to add more keywords, LSI terms, or specific long-tail keywords, click on ‘Add Additional Keywords.’ Type your keywords into the bar that appears. Click out once done.

As a finishing touch, you can add any notes you want to give to your writer by clicking on ‘Add Additional Notes.’

Your content brief is now ready. Click the ‘Share icon’ next to your doc name to share it with a team member.
To start creating your content, toggle to the “Back To Editor” . The brief you created appears to your right. You can click on ‘Paste Outline’ to have your structure formatted and inserted into your writing space. You can now fill between the headings with the help of AI to stick to the brief.
Helpful real-time suggestions like “content grade, word count, and key terms usage” appear at the bottom. You can also find the key terms, links to competing blogs, and top questions handy.
Super simple, right? We agree. Create your briefs and share them with your team to reduce the back and forth and maximize efficiency.
Thanks for watching.


